Mark DiVecchio's O-Gauge Train Layouts

1992 Layout Page

2006 Layout Page

2009 Layout Page

P&LE Postcards by Howard Fogg 

Plasticville Buildings

Portable Layout Page

Train Clubs

Bing Track

Remote Train Control Program

YouTube Channel

OOK Radio Support

Technical Videos

3D Prints for my Layout

More RTC Videos

ADPCM - Playing clips from .mth sound files

P&LE McKees Rocks Locomotive Shop
3D Printer Project

RFID Train Detection

Engine and Car Operation
Hints and Tricks

RFID Tag Programmer using PN532

RTC Control Language - Scripting

RTC WiFi Support
Getting rid of (most of) the wires

More RFID Tag Videos

RTC Control Language - Signaling

ESP8266 Sketches : RTCAdapter RTCWTIU

Signals


3D Printed Enhancements to the Plasticville Motel

This Page last updated on .

(For more of my 3D prints, click here)

Designing and Printing Enhancements to the original  O/S scale Plasticville Motel

I have a Plasticville Motel on my layout but I always felt that something was missing - then I realized it needed a motel office occupied by a slightly quirky attendant named Norman, who was always up in other people's business.

In HO land, the motel had the office (and a pool):


Bought on eBay. This HO version is glued.

I wanted my O scale layout to have one. I bought this HO scale motel so I would have a model that I could examine.
 

Step 1 Buy two Plasticville Motels on eBay

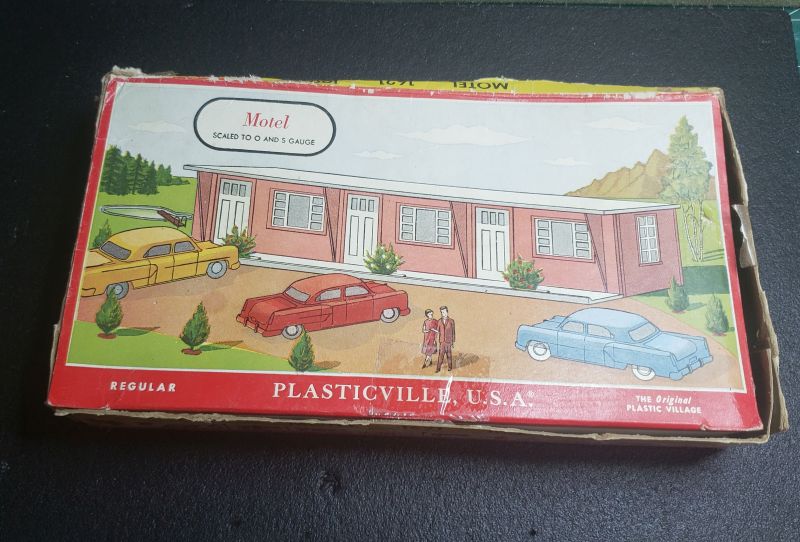
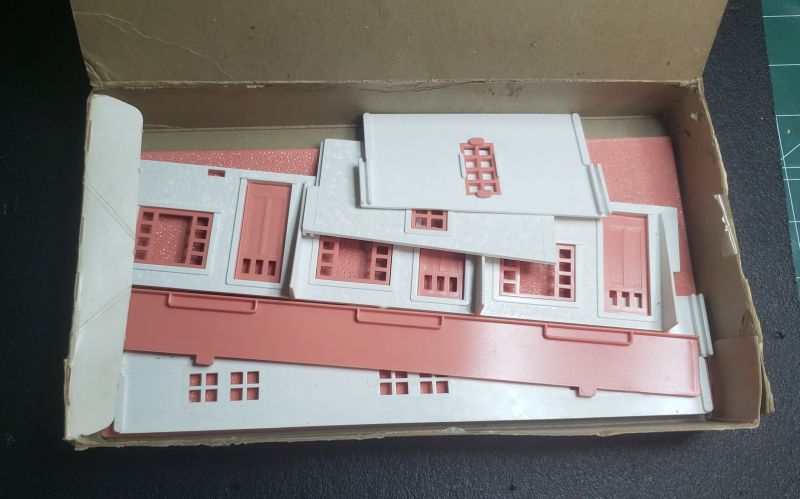
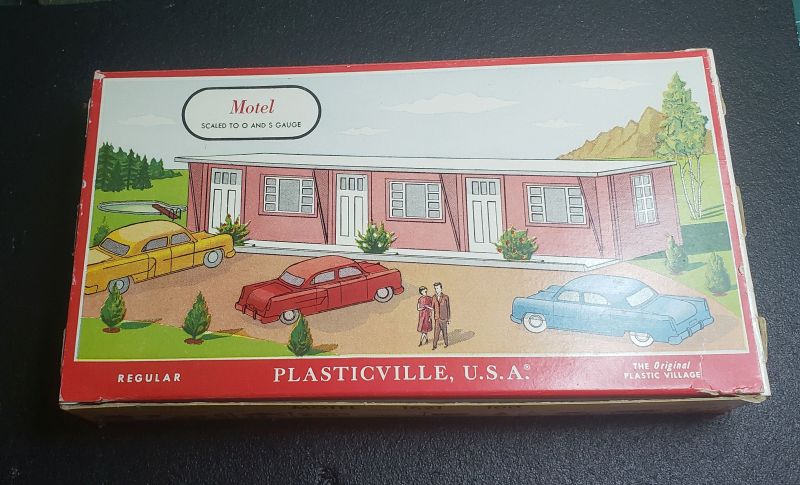
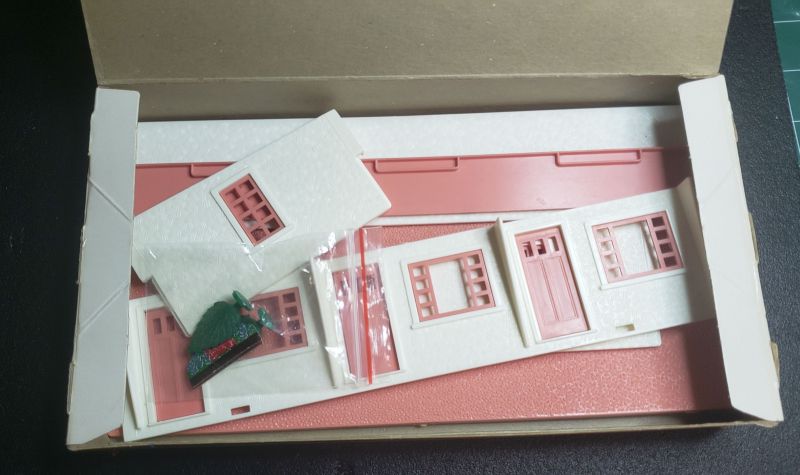
Well, you can find almost anything for sale on eBay. Many Plasticville 1621 Motels to choose from. I selected the version with the white walls and salmon trim. I bought two. One would be the donor that would become the office. Shipping is getting expensive. I found these two that came with boxes. One even had two evergreen trees and one bush. Neither had automobiles.


The donor motel
Note the pool in the left background - but the O/S version never had a pool.

These pieces will be cut up to make the office. White walls and salmon trim.

The Original Plasticville Motel #1621
$1.00 when introduced in 1957.

This motel will be assembled as the guest rooms of the motel. Also white walls and salmon trim.


Step 2  Use OpenSCAD to design the motel sign and the patio cover.

I use the OpenSCAD program to develop many 3D models. It is fairly simple to use. Just create the shape you need (cubes, rectanglular solids, cylinders, etc) and put them in position. Here are the two OpenSCAD programs for the motel sign and the patio cover.


OpenSCAD Motel Sign
The Sign was printed in two halves which have to be glued together
// Plasticville Motel Sign
//


$fn = 60;

ScaleMult = 1.54;

translate ([10, 0, 0]) print_part();
print_mirror();


module print_part() {
difference() {
union(){
linear_extrude(1.55 * ScaleMult) {
polygon(
points = [
[0, 0],
[0, 45.43 * ScaleMult],
[33.60 * ScaleMult, 45.43 * ScaleMult],
[17.29 * ScaleMult, 0]
]
);
}
color("blue")
translate([0, 0, 1.55 * ScaleMult])
cube([1.55 * ScaleMult, 45.43 * ScaleMult, 1.55 * ScaleMult]);

color("green")
translate([0, (45.43 - 1.55) * ScaleMult, 1.55 * ScaleMult])
cube([33.60 * ScaleMult, 1.55 * ScaleMult, 1.55 * ScaleMult]);

color("black")
translate([(17.29) * ScaleMult, 0, 1.55 * ScaleMult])
rotate([0 ,0 , 70.25 ])
cube([47.46 * ScaleMult, 1.55 * ScaleMult, 1.55 * ScaleMult]);

translate([0, -5.18* ScaleMult, 0])
cube([4.71* ScaleMult, 5.18* ScaleMult, 1.55 * ScaleMult]);

color("red")
translate([2 * 4.71 * ScaleMult, -5.18* ScaleMult, 0])
cube([4.71* ScaleMult, 5.18* ScaleMult, 1.55 * ScaleMult]);

color("red")
translate([(33.60 -3.62 ) * ScaleMult, (45.43 - 2.55) * ScaleMult, 0])
rotate([0, 0, 45 - 70.25])
rotate_extrude(angle = 45 + 70.25, convexity = 10, $fn = 100)
translate([1 * ScaleMult, 0, 0])
square([ 1.55 * ScaleMult , 2 * 1.55 * ScaleMult ]);
color("white")
translate([ 13 * ScaleMult, 41 * ScaleMult, 1.00 * ScaleMult])
linear_extrude(height=1.55 * ScaleMult) // convert to 3D object
text("MOTEL", font=str("Square721 BT", ":style=Bold"), size=7 * ScaleMult, spacing=1.7, halign="center", direction="ttb");

} // union
color("yellow")
translate([(33.60 -3.83) * ScaleMult, (45.43 - 2.694) * ScaleMult, 0])
rotate([0, 0, 45 - 70.25])
rotate_extrude(angle = 45 + 70.25, convexity = 10, $fn = 100)
translate([2.694 * ScaleMult, 0, 0])
square([ 2.694 * ScaleMult , 5 * ScaleMult ]);
} // difference
}


module print_mirror() {
difference() {
union(){
linear_extrude(1.55 * ScaleMult) {
polygon(
points = [
[0, 0],
[0, 45.43 * ScaleMult],
[-33.60 * ScaleMult, 45.43 * ScaleMult],
[-17.29 * ScaleMult, 0]
]
);
}
color("blue")
translate([-1.55 * ScaleMult, 0, 1.55 * ScaleMult])
cube([1.55 * ScaleMult, 45.43 * ScaleMult, 1.55 * ScaleMult]);

color("green")
translate([-33.60 * ScaleMult, (45.43 - 1.55) * ScaleMult, 1.55 * ScaleMult])
cube([33.60 * ScaleMult, 1.55 * ScaleMult, 1.55 * ScaleMult]);

color("black")
translate([(-17.29 + 1.55) * ScaleMult, 0, 1.55 * ScaleMult])
rotate([0 ,0 , -180 - 70.36])
cube([47.46 * ScaleMult, 1.55 * ScaleMult, 1.55 * ScaleMult]);

*translate([-4.71* ScaleMult, -5.18* ScaleMult, 0])
cube([4.71* ScaleMult, 5.18* ScaleMult, 1.55 * ScaleMult]);

*color("red")
translate([-3 * 4.71 * ScaleMult, -5.18 * ScaleMult, 0])
cube([4.71* ScaleMult, 5.18* ScaleMult, 1.55 * ScaleMult]);

color("red")
translate([(-33.60 +3.64 ) * ScaleMult, (45.43 - 2.55) * ScaleMult, 0])
rotate([0, 0, 45 - 70.36 + 112])
rotate_extrude(angle = 45 + 70.36, convexity = 10, $fn = 100)
translate([1 * ScaleMult, 0, 0])
square([ 1.55 * ScaleMult , 2 * 1.55 * ScaleMult ]);
color("white")
translate([ -7 * ScaleMult, 41 * ScaleMult, 1.00 * ScaleMult])
linear_extrude(height=1.55 * ScaleMult) // convert to 3D object
text("MOTEL", font=str("Square721 BT", ":style=Bold"), size=7 * ScaleMult, spacing=1.7, halign="center", direction="ttb");
} // union

translate([(-33.60 + 3.8) * ScaleMult, (45.43 - 2.70) * ScaleMult, 0])
rotate([0, 0, 45 -70.36 + 112])
rotate_extrude(angle = 45 + 70.36, convexity = 10, $fn = 100)
translate([2.694 * ScaleMult, 0, 0])
square([ 2.694 * ScaleMult , 5 * ScaleMult ]);
} // difference
}


OpenSCAD Patio Cover
// Plasticville Motel Patio Cover
//


$fn = 60;

ScaleMult = 1.54;

print_part();

module print_part() {

// Five rows of longer pieces
LongPiece();
translate([0, 9.55 * ScaleMult, 0]) LongPiece();
translate([0, 2 * 9.55 * ScaleMult, 0]) LongPiece();
translate([0, 3 * 9.55 * ScaleMult, 0]) LongPiece();
translate([0, 4 * 9.55 * ScaleMult, 0]) LongPiece();


// Five rows of shorter pieces
Offset = 9.9;
translate([(4 + 0.55) * ScaleMult, 0, 0]) ShortPiece();
translate([(4 + 1*Offset) * ScaleMult, 0, 0]) ShortPiece();
translate([(4 + 2*Offset) * ScaleMult, 0, 0]) ShortPiece();
translate([(4 + 3*Offset) * ScaleMult, 0, 0]) ShortPiece();
translate([(4 + 4*Offset) * ScaleMult, 0, 0]) ShortPiece();

}

module LongPiece() {
difference() {
cube([50 * ScaleMult, 1.8 * ScaleMult, 5 * ScaleMult]);
Hook();

translate([50.1 * ScaleMult, 1.8 * ScaleMult, 0])
rotate([0, 0, 180])
Hook();
}
// translate([46 * ScaleMult, 0, 0]) Hook();
}

module Hook(){
// Hook
translate([0, 0, 2.5 * ScaleMult])
cube([4.55 * ScaleMult, 2 * ScaleMult, 3 * ScaleMult]);
translate([1.8 * ScaleMult, 0, 1.3 * ScaleMult])
cube([(4.55 - 1.8) * ScaleMult, 2 * ScaleMult, 1.8 * ScaleMult]);
}

module ShortPiece() {
cube([1.8 * ScaleMult, 40 * ScaleMult, 1.8 * ScaleMult]);
}


Step 3 Use my 3D printer to fabricate the motel sign and patio cover

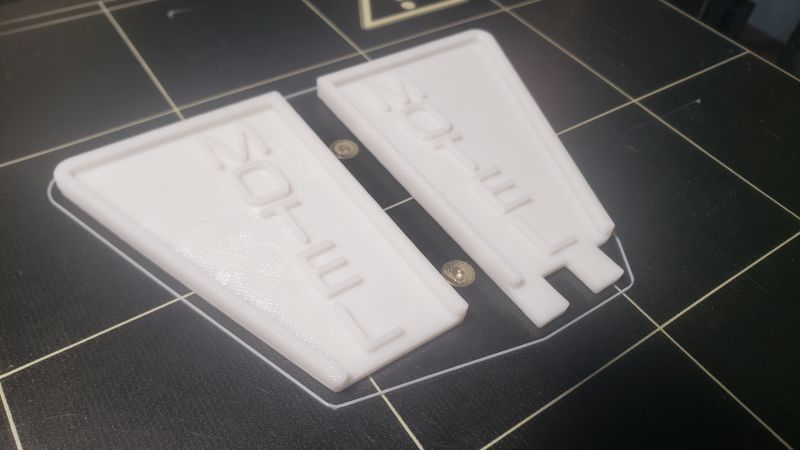
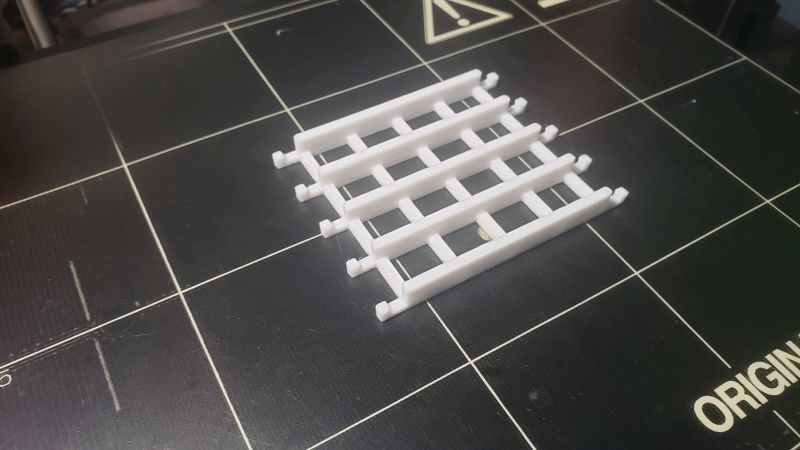
I printed the sign and the patio cover with white ABS to match the walls. I painted the sign's words black. (There are also versions of the sign that use a stickon paper sign reading "Siesta Motel" but I didn't do that one.)

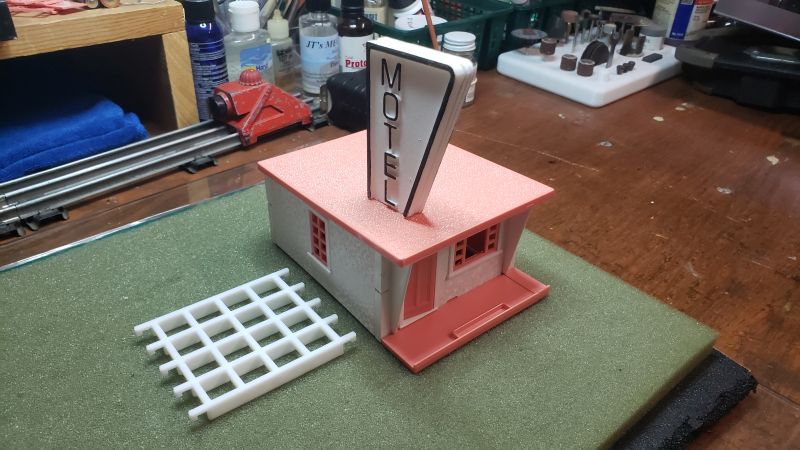
The motel sign (shown on the print bed) printed in two pieces because of the raised lettering. To be glued together

The Patio Cover 

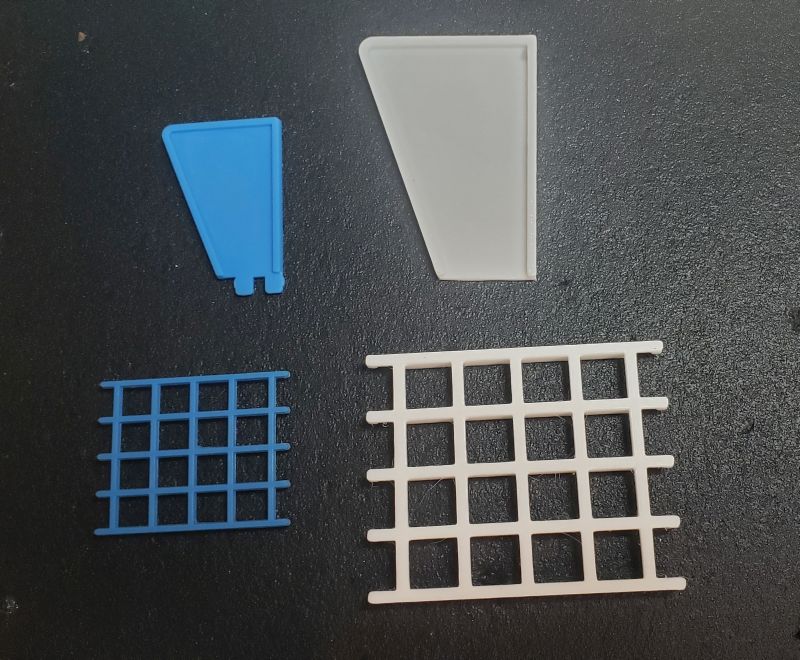
Comparison of the HO scale (blue) and O/S scale (white) parts.
The early version of the motel sign didn't have tabs or lettering.


Step 4 Cut down a full three room motel to make a one room office

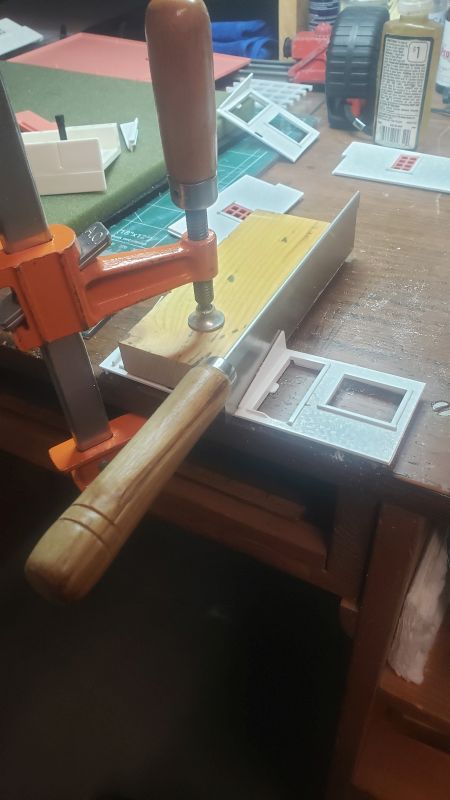
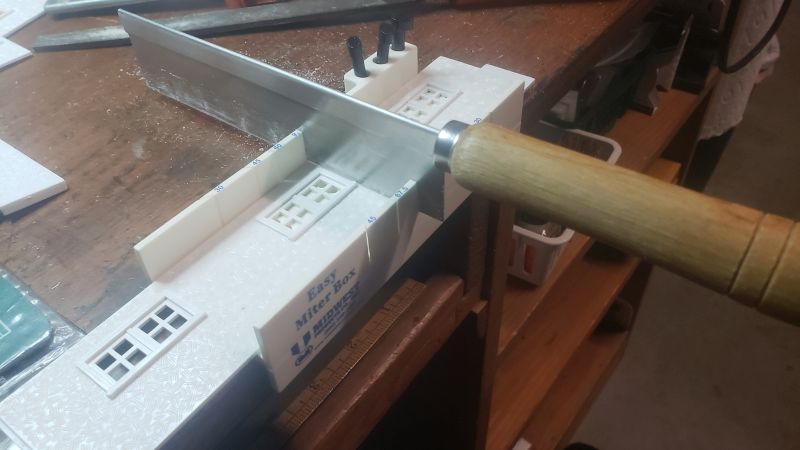
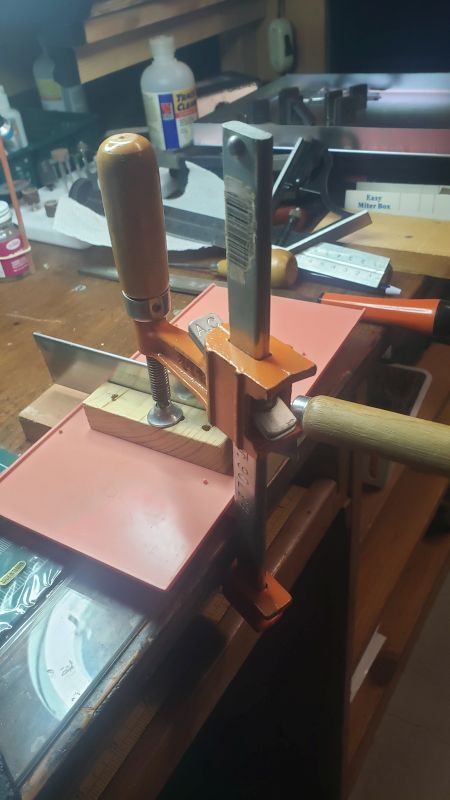
This is not an exact match to the HO office but gets pretty close. This requred cuts of the front wall, the rear wall, the roof and the sidewalk. I have a small mitre box which I could use to cut the back wall and the sidewalk. I had to rig up a jig to cut the front wall and the roof because they would not fit into the mitre box.

Each piece had to have a section cut out from its middle (so two cuts were requied for each) and then the two outside pieces were glued together.


Front Wall

Rear Wall

Roof

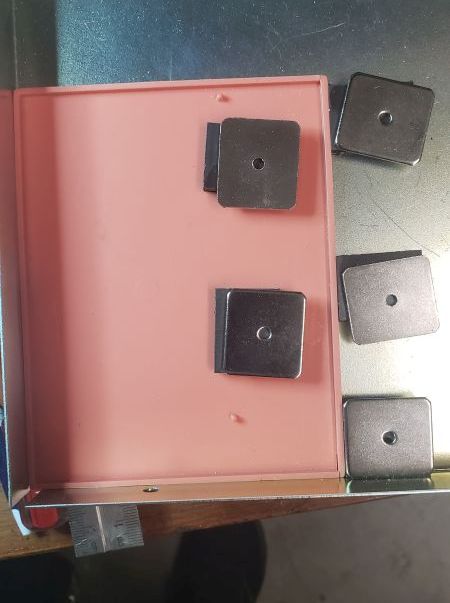
Once the front wall, rear wall, roof and sidewalk were cut, the two pieces of each had to be glued together to make one piece. This was done using a magnetic gluing jig which I got from MicroMark.


Step 5 Assemble the motel

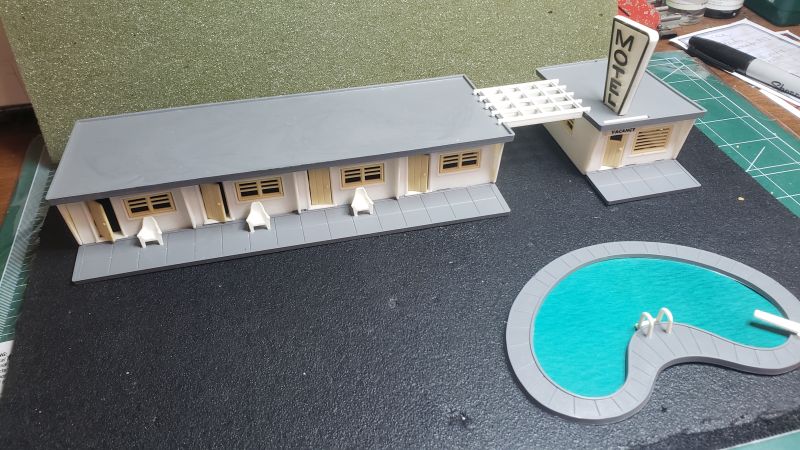
I had to make a hole in the roof for the motel sign. That was hard. I ended up cutting one of the tabs off the sign so I only required one hole. Like the original motel, no glue is needed for the final assembly.


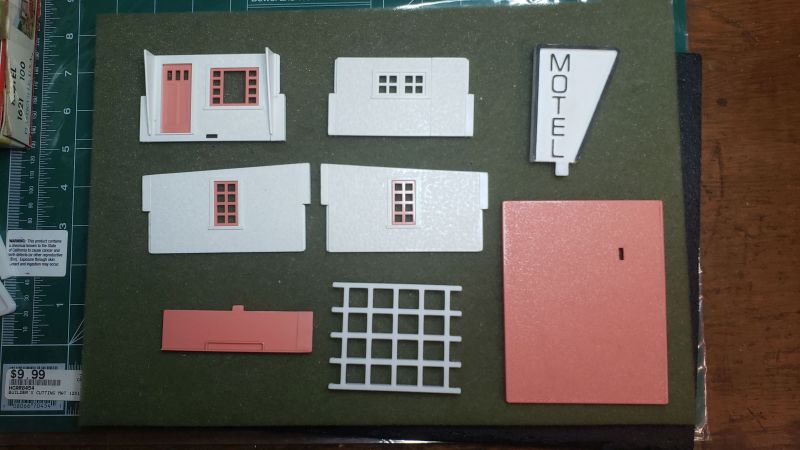
All of the pieces

The Office

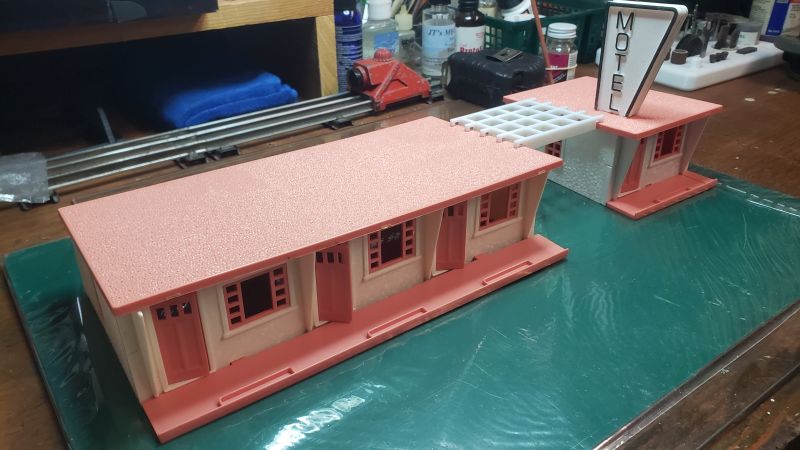
The complete motel - guest rooms and office


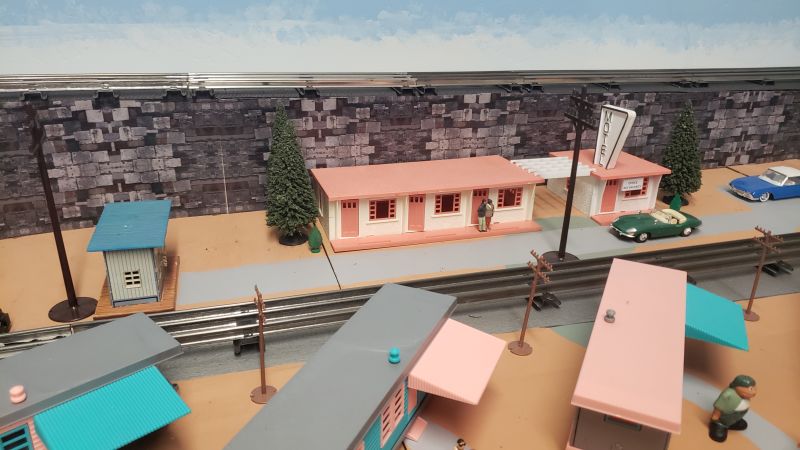
Step 6 Place the motel on the layout

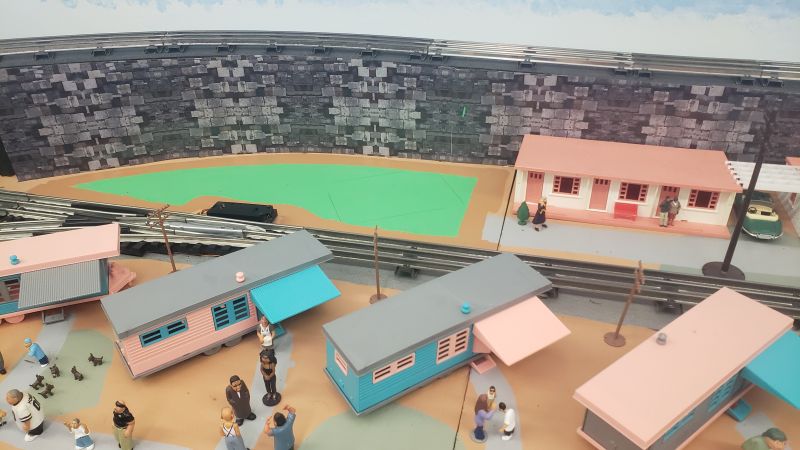
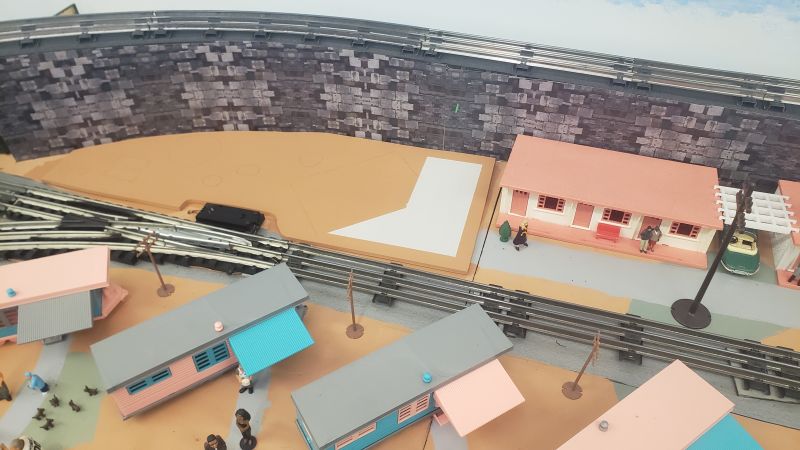
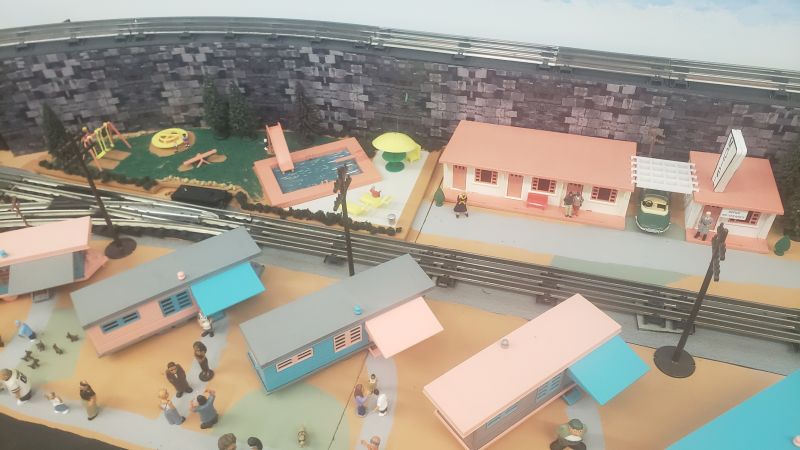
The spot where I originally had the motel is not big enough for the motel and office so I did some redevelopment


Future Enhancements

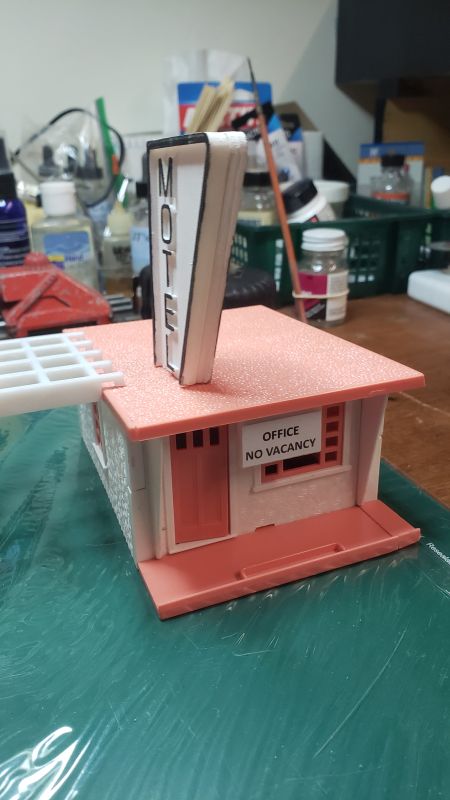
1. Make a "OFFICE - NO VACANCY" sign for the office door

A pretty simple print - just a rectangular solid - 27mm x 20mm x 3mm. A word processor to make the words (12pt font). Cut out the words, glue to sign, glue sign at the front of the office under the roof.

OpenSCAD "OFFICE - NO VACANCY" sign
// Plasticville Motel Office Sign
//

$fn = 60;

print_part();

module print_part() {

cube([27, 20 , 3 ]);

}


2. Make an O scale pool

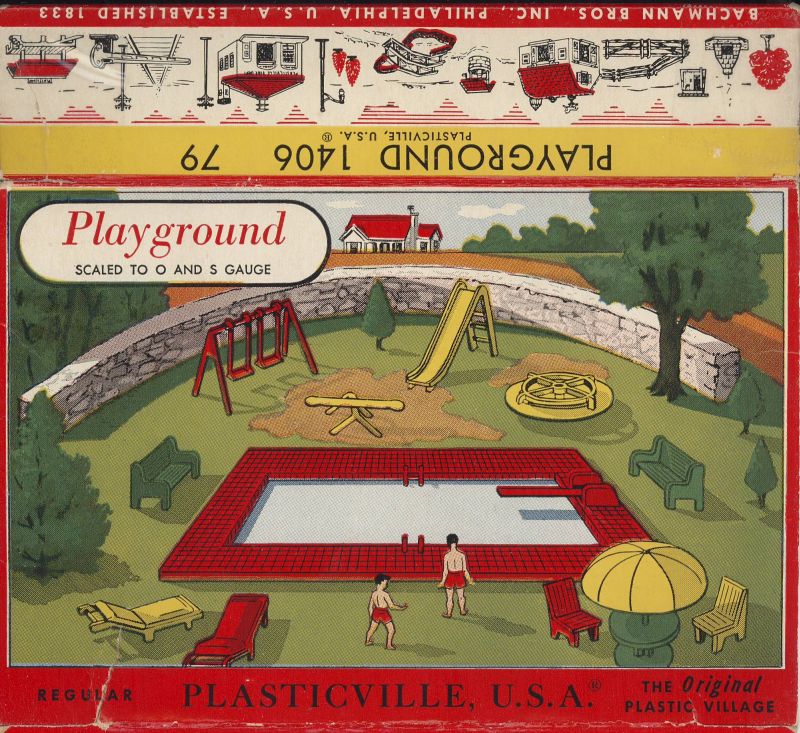
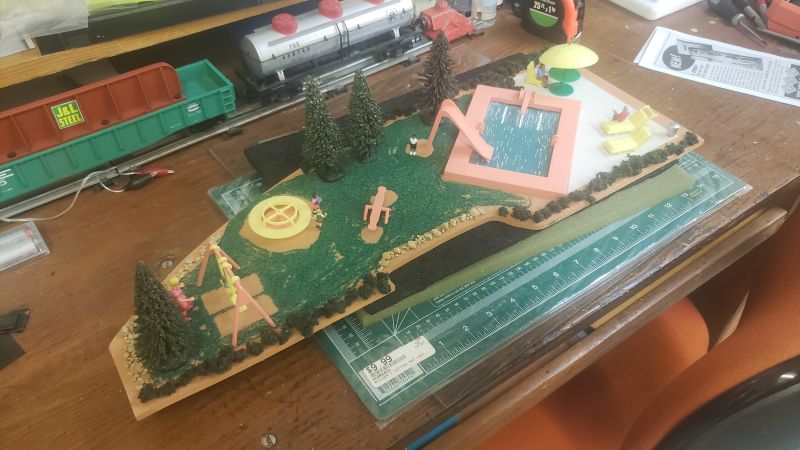
As I was digging out my 3D printer again, I realized that there already was an O scale pool from Plasticville. I needed one in salmon to match the motel. Part of the 1406 Playground. This was going to save me a lot of work. My birthday was coming up and my wife asked for gift ideas. I pointed her to eBay and to a search for the 1406. To my surprise, I received this from her as a gift.


Orginally 79 cents when released in 1957 - a little more in 2026.

I had an empty spot next to the motel and office


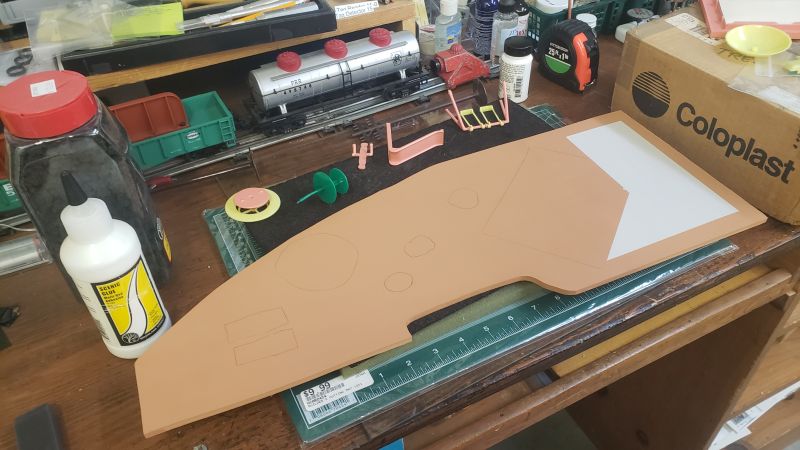
The new placement was the one area on my layout that was hard to reach. So instead, I cut a piece of eighth inch MDF that fit into the spot.

I'll work on the pool area on my workbench and then place it on the layout.

I used scenic cement to add grass, rocks, a few bushes and trees.

The motel - complete.
We can lounge by the pool and watch the trains pass by.
There is Norman standing in front of the offce (wearing a trench coat in the summer time??).

This site prepared and maintained by Mark DiVecchio

email :  markd@silogic.com

SD&A HOME
 
 Mark's Home Page

The DiVecchio genealogy home page
The Frazzini genealogy home page

This site will be under construction for a while.